In this article I am going to show you the current status of the Notification API, explain different browser implementations and show off how to use the API.
Browser Support #
At the moment (August 2013) the following browsers support the Notification API. For further details, check the current status on caniuse.com.
- Firefox 22+
- Chrome 5+
- Safari 6+ (only on Mountain Lion)
- Blackberry 10
- Firefox for Android
- Firefox OS
Introduction #
The Notification API allows you to display notifications to users outside of a web page without the need of any interaction by the user. This way you can notify the user even if the browser is currently not in focus, and remind him of new emails, tweets or whatever you may think the user needs to know right now.
Check for support #
Well, if we would only want to know if a browser fulfils the official W3C Specification, we could simple check for
"Notification" in window, but as old WebKit browsers and Firefox for mobile have different implemenations, the final check is:
var NotificationIsSupported = !!(window.Notification /* W3C Specification */ || win.webkitNotifications /* old WebKit Browsers */ || navigator.mozNotification /* Firefox for Android and Firefox OS */) {}Ask for permission #
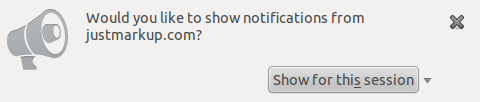

Before we can show a Notification users have to grant permission. On Firefox OS this can be done within the manifest.webapp by setting the appropriate permssion for Desktop Notifications.
"permissions": { "desktop-notification": { "description" : "To show notifications" } }On every other browser we have to attach the requestPermission() function to an event handler, like click or mousedown. It is important to mention, that it is not possible to ask for permission and show notifications without any interaction from the user.
Altough Chrome 23 supports window.Notification.requestPermission it will break the browser, so we first have to check for the old WebKit implemantation to get it successfully running there. Here is the cross-browser way to ask for permission.
var askForPermission = document.getElementById('askforpermission');

askForPermission.addEventListener('click', function () {
	if (window.webkitNotifications && window.webkitNotifications.checkPermission) {
		window.webkitNotifications.requestPermission();
	} else if (window.Notification && window.Notification.requestPermission) {
		window.Notification.requestPermission();
	}
});
Check permission level #
After requesting permission we have to check the permission level. There are three possible values we may get after asking for permission:
- 0 (WebKit) or “default” (W3C) – User hasn’t reacted yet
- 1 (WebKit) or “granted” (W3C) – User allowed us to show notifications
- 2 (WebKit) or “denied” (W3C) – User did NOT allow us to show noticiations
As you can see, the values in old WebKit implementations are quite different. Therefore and since the permission on Firefox OS will always be granted our final check looks like this.
var PERMISSION_DEFAULT = "default",
	PERMISSION_GRANTED = "granted",
	PERMISSION_DENIED = "denied",
	PERMISSION = [PERMISSION_GRANTED, PERMISSION_DEFAULT, PERMISSION_DENIED];

function checkPermission() {
	var permission;
	if (window.webkitNotifications && window.webkitNotifications.checkPermission) {
		permission = PERMISSION[window.webkitNotifications.checkPermission()];
	} else if (navigator.mozNotification) {
		permission = PERMISSION_GRANTED;
	} else if (window.Notification && window.Notification.permission) {
		permission = window.Notification.permission; } return permission;
	}
};
Show the notification #

After handling the permission we can finally start showing notifications. Here is the rather long cross-browser code to do so.
function showNotification (title, options) {
	var notification;
	if (checkPermission() === PERMISSION_GRANTED) {
		if (window.Notification) {
			notification = new window.Notification(title, {
				icon: options.icon || "",
				body: options.body || "",
				tag: options.tag || ""
			});
		} else if (window.webkitNotifications) {
			notification = window.webkitNotifications.createNotification(options.icon, title, options.body);
			notification.show();
		} else if (navigator.mozNotification) {
			notification = navigator.mozNotification.createNotification(title, options.body, options.icon);
			notification.show();
		}
		return notification;
	}
}

var showNotificationButton = document.getElementById('shownotificationbutton');
showNotificationButton.addEventListener('click', function () {
	showNotification("Title", {
		body: "Body",
		icon: "icon.ico",
		tag: "tag",
		dir: "ltr",
		lang: "en-US"
	}
);
Let me explain it step by step.
First of all we define a function (here it is called showNotification), to handle the different browser implementations.
Within this function we first have to make sure that we are able to show notifications by checking against the function checkPermission, defined further above (checkPermission() === PERMISSION_GRANTED).
If the check is true, we define a new Notification Object, where we pass one or more of the following parameters:
- Title (necessary)
- Body (optional)
- Icon (optional)
- Tag (optional, only in the W3C Spec)
- Dir (optional, only in the W3C Spec)
- Lang (optional, only in the W3C Spec)
The Last step is to attach the function to an event handler and pass the parameters we want to show to the user.
Résumé #
The Notification API in his final form is relatively new and therefore browser support is not that great at the moment, but as I see this API only as a nice to have feature, there speaks nothing against not using it today. As the old WebKit implementation and the Firefox OS implementation will be around for a while, I definitely would use a Pollyfill, to avoid the headache I had, trying to get it running on different browser.
Demo #
If you want to see it in action check out the Demo made by Tsvetan Tsvetkov.
Further reading #
Special thanks to Tsvetan Tsvetkov for proofreading the article!