In 2017, the average transfer size for websites was 3,4 MB. A big part of it (on average 1.8 MB) are images. Especially on article sites, many of these images may be GIFs. Some of these GIFs are multiple MBs and while looking at GIFs can be really funny, it is less so if you watch them on a slow device or when exceeding your available data by reading only one article. In this article, I will show how to convert GIF to MP4 to save data, how to embed the video responsible, how to react to the Save-Data header, how to enhance it using the IntersectionObserver and how to use MP4 as source for an image in supported browsers.

Converting GIF to MP4 #
First we have to convert our existing GIF files to MP4. There are multiple options available.
Use FFmpeg and the command line #
First you have to download and install FFmpeg, and after that, you can run ffmpeg -i source.gif output.mp4 in your terminal to convert a GIF with the name source to a MP4 with the name output to the same folder. You can also batch convert a directory of GIFs. Installing FFmpeg can be a challenge, so let’s see what other options we have.
Online converter #
There are multiple Services available online to convert GIF to MP4 and many also allow you to convert multiple at once.
Cloudinary #
If you are already using Cloudinary, you can replace .gif with .mp4 and they will dynamically convert it
Giphy #
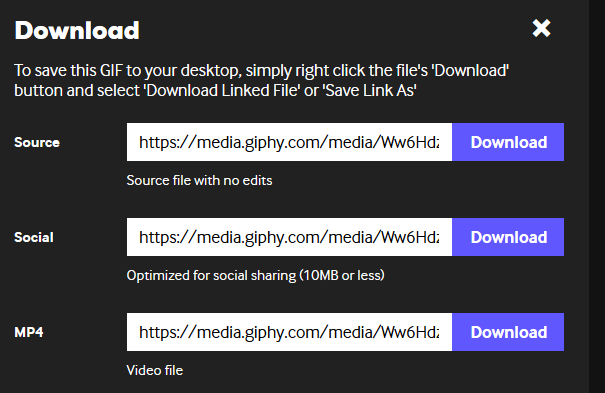
When using a GIF from Giphy you can download a GIF and a MP4 version directly there.
There are other options available, but let’s move on to embedding the video on a site.
Use <video> as default #
We start with using the video element:
<video muted controls playsinline data-gif preload="metadata">
    <source src="file.mp4" type="video/mp4">
    Your browser doesn't support playing videos, but you can download it  instead.
    <a href="file.gif">Download as GIF (1000kB)</a>
    <a href="file.mp4">Download as Video(100kB)</a>
</video>
I added preload="metadata" to avoid that the browser will preload the whole video, and also the controls attribute to show the video controls and playsinline so the video will play inline and not fullscreen on iOS. This way the user can decide if they want to view the video or not. In addition, I added a fallback text for unsupported browsers and links to download the file as GIF or MP4. This is, however, not really a replacement for a GIF, so let`s move on.
Autoplay video if supported #
GIFs are autoplaying and to make our video react like a GIF we want the video to start immediately and also loop. First we check if the browser is capable of autoplaying videos:
// https://git.io/vH4Ek
var supports_video_autoplay = function(callback) {

    var v = document.createElement("video");
    v.paused = true;
    var p = false;
    try {
        p = "play" in v && v.play();
    } catch (err) {

    }
    typeof callback === "function" && callback(!v.paused || "Promise" in window && p instanceof Promise);

};

supports_video_autoplay(function(supportsAutoplay) {
    // supports video autoplay and querySelector
    if (supportsAutoplay && 'querySelector' in document) {
        var videos = document.querySelectorAll('[data-gif]');

        [].forEach.call(videos, function(video) {
            video.removeAttribute('controls');
            video.setAttribute('autoplay', true);
            video.setAttribute('loop', true);
        });
    } else {
        // no video autoplay support :(
    }
});
I found this test after looking at the Modernizr repository and seeing this solution by Paul O’Rely. If the browser supports autoplay we get all our “GIF videos”, remove the controls attribute and add the autoplay and loop attributes. This way the videos will now autoplay and loop like a GIF.
Use IntersectionObserver #
So, now all our GIF videos start automatically if autoplay is supported. We may use several of these videos on a page and playing them all at once means the browser has to download them all and this may also make the site unresponsive. So, as a next step we only play videos if they are actually in the Viewport using the Intersection Observer API.
if (supportsAutoplay && 'IntersectionObserver' in window) {
    var videos = document.querySelectorAll('[data-gif]');

    observer = new IntersectionObserver(entries => {
        entries.forEach(entry => {
            var video = entry.target;
            if (entry.intersectionRatio > 0) {
                // video is in the viewport - start it
                if (!video.hasAttribute('autoplay')) {
                    video.setAttribute('autoplay', true);
                    video.setAttribute('loop', true);
                }
                video.play();
            } else {
                // video is outside the viewport - pause it
                video.pause();
            }
        });
    });

    [].forEach.call(videos, function(video) {
        video.removeAttribute('controls');

        observer.observe(video);
    });
}
First we change our feature test and check if IntersectionObserver is supported. Next we define a new IntersectionObserver. If entry.intersectionRatio is bigger than 0, the video is in the viewport. In this case we add the autoplay and loop attributes if they were not already added and play the video. Otherwise, we will pause the video.
You may have noticed that by changing our feature test, now only browsers which support IntersectionObserver will get the autoplay feature. Support for IntersectionObserver is pretty good, and as people using older browsers also often use slower hardware I prefer to not play all videos at once for them and instead giving them a choice.
Save-data header #
There is another case where we shouldn’t autoplay any video, when the Save-data header is present.
We should use the Save-Data client hint request header to reduce the initial transfer size for users who have opted-in to “data savings” mode in their browser.
We can either get the info if a user has turned on Save-data on the server-side. Here is an example using PHP, which will set the data-save-data attribute on the html element if the header returns true.
$saveData = (isset($_SERVER["HTTP_SAVE_DATA"]) && stristr($_SERVER["HTTP_SAVE_DATA"], "on") !== false) ? true : false;
<html <?php if($saveData === true) : echo("data-save-data"); endif; ?>">
We can also check for Save-data on the client-side.
var saveData = navigator.connection && navigator.connection.saveData;So, we extend our test and check for saveData. If a user opt-in to saveData we will not autoplay the videos.
var saveData =  navigator.connection && navigator.connection.saveData;
if (supported && 'IntersectionObserver' in window && !saveData) {
    // autoplay videos
}
Enhance with serving MP4 via <img> #
The latest Safari Technology Preview now has support for using MP4 as the source for an img <img src="file.mp4" alt="">. Early tests show that using img instead of video to deliver MP4 files result in 20x faster display and 7x faster decoding time. Let’s see how we can improve our code to use img instead of video to show the video file.
First we need a feature test to check if the MP4 format is supported for img:
var supports_mp4_in_img = function(callback) {

    var image = new Image();

    image.onload = function() {
        var isSupported = image.width > 0 && image.height > 0;
        callback(isSupported);
    };

    image.onerror = function() {
        callback(false);
    };

    image.src = "data:video/mp4;base64,AAAAIGZ0eXBpc29tAAACAGlzb21pc28yYXZjMW1wNDEAAAAIZnJlZQAAAs1tZGF0AAACrgYF//+q3EXpvebZSLeWLNgg2SPu73gyNjQgLSBjb3JlIDE0OCByMjYwMSBhMGNkN2QzIC0gSC4yNjQvTVBFRy00IEFWQyBjb2RlYyAtIENvcHlsZWZ0IDIwMDMtMjAxNSAtIGh0dHA6Ly93d3cudmlkZW9sYW4ub3JnL3gyNjQuaHRtbCAtIG9wdGlvbnM6IGNhYmFjPTEgcmVmPTMgZGVibG9jaz0xOjA6MCBhbmFseXNlPTB4MzoweDExMyBtZT1oZXggc3VibWU9NyBwc3k9MSBwc3lfcmQ9MS4wMDowLjAwIG1peGVkX3JlZj0xIG1lX3JhbmdlPTE2IGNocm9tYV9tZT0xIHRyZWxsaXM9MSA4eDhkY3Q9MSBjcW09MCBkZWFkem9uZT0yMSwxMSBmYXN0X3Bza2lwPTEgY2hyb21hX3FwX29mZnNldD0tMiB0aHJlYWRzPTEgbG9va2FoZWFkX3RocmVhZHM9MSBzbGljZWRfdGhyZWFkcz0wIG5yPTAgZGVjaW1hdGU9MSBpbnRlcmxhY2VkPTAgYmx1cmF5X2NvbXBhdD0wIGNvbnN0cmFpbmVkX2ludHJhPTAgYmZyYW1lcz0zIGJfcHlyYW1pZD0yIGJfYWRhcHQ9MSBiX2JpYXM9MCBkaXJlY3Q9MSB3ZWlnaHRiPTEgb3Blbl9nb3A9MCB3ZWlnaHRwPTIga2V5aW50PTI1MCBrZXlpbnRfbWluPTEwIHNjZW5lY3V0PTQwIGludHJhX3JlZnJlc2g9MCByY19sb29rYWhlYWQ9NDAgcmM9Y3JmIG1idHJlZT0xIGNyZj0yMy4wIHFjb21wPTAuNjAgcXBtaW49MCBxcG1heD02OSBxcHN0ZXA9NCBpcF9yYXRpbz0xLjQwIGFxPTE6MS4wMACAAAAAD2WIhAA3//728P4FNjuZQQAAAu5tb292AAAAbG12aGQAAAAAAAAAAAAAAAAAAAPoAAAAZAABAAABAAAAAAAAAAAAAAAAAQAAAAAAAAAAAAAAAAAAAAEAAAAAAAAAAAAAAAAAAEAAAAAAAAAAAAAAAAAAAAAAAAAAAAAAAAAAAAAAAAACAAACGHRyYWsAAABcdGtoZAAAAAMAAAAAAAAAAAAAAAEAAAAAAAAAZAAAAAAAAAAAAAAAAAAAAAAAAQAAAAAAAAAAAAAAAAAAAAEAAAAAAAAAAAAAAAAAAEAAAAAAAgAAAAIAAAAAACRlZHRzAAAAHGVsc3QAAAAAAAAAAQAAAGQAAAAAAAEAAAAAAZBtZGlhAAAAIG1kaGQAAAAAAAAAAAAAAAAAACgAAAAEAFXEAAAAAAAtaGRscgAAAAAAAAAAdmlkZQAAAAAAAAAAAAAAAFZpZGVvSGFuZGxlcgAAAAE7bWluZgAAABR2bWhkAAAAAQAAAAAAAAAAAAAAJGRpbmYAAAAcZHJlZgAAAAAAAAABAAAADHVybCAAAAABAAAA+3N0YmwAAACXc3RzZAAAAAAAAAABAAAAh2F2YzEAAAAAAAAAAQAAAAAAAAAAAAAAAAAAAAAAAgACAEgAAABIAAAAAAAAAAEAAAAAAAAAAAAAAAAAAAAAAAAAAAAAAAAAAAAAAAAAAAAY//8AAAAxYXZjQwFkAAr/4QAYZ2QACqzZX4iIhAAAAwAEAAADAFA8SJZYAQAGaOvjyyLAAAAAGHN0dHMAAAAAAAAAAQAAAAEAAAQAAAAAHHN0c2MAAAAAAAAAAQAAAAEAAAABAAAAAQAAABRzdHN6AAAAAAAAAsUAAAABAAAAFHN0Y28AAAAAAAAAAQAAADAAAABidWR0YQAAAFptZXRhAAAAAAAAACFoZGxyAAAAAAAAAABtZGlyYXBwbAAAAAAAAAAAAAAAAC1pbHN0AAAAJal0b28AAAAdZGF0YQAAAAEAAAAATGF2ZjU2LjQwLjEwMQ==";
}
For our test we define a new Image(), use a small base64 encoded mp4 file and check onload if the width and height are bigger than 0. If yes the browser supports mp4 files for images. If not or if there was an error it doesn’t support it.
supports_mp4_in_img(function(supportsMP4InImg) {
    if (supportsMP4InImg) {
        var videos = document.querySelectorAll('[data-gif]');

        [].forEach.call(videos, function(video) {
            var img = new Image();
            img.src = video.querySelector('source').src;
            img.setAttribute('alt', "");
            if (img.decode) {
                img.decode().then(function() { video.parentNode.replaceChild(img, video); });
            } else {
                img.onload = function() {
                    video.parentNode.replaceChild(img, video);
                }
            }

        });
    }  else {
    // use as described before
    }
})
Next, we call the test function and if the callback returns true we can change our videos to images. We loop over all our videos and for every video found create a new img and replace the video with it. We also add the alt attribute for the img here. As the latest Safari version also supports the decode method for img, I added a test here to use this instead of onload when supported. The decode method is great because it ensures that the image can be appended to the DOM without causing a decoding delay on the next frame.
Last fallback #
According to Can I use about 94% of all actively used browsers support the <video> element. My first idea was to use <img src="cat.gif" alt=""> as a fallback inside the <video> element, but after some testing I found that modern browser, with support for the video element will download the img defined inside. So this is a no-go as our goal is to decrease transferred file size and not increasing it even more.
Use <object> #
As <img> is not a solution, I next tried with <object>.
<video muted autoplay loop playsinline>
    <source src="file.mp4" type="video/mp4">
    <object data="file.gif" type="image/gif">Alternative text</object>
    <a href="file.gif">Download as GIF (1000kB)</a>
    <a href="file.mp4">Download as Video(100kB)</a>
</video>
Using <object> only browsers not supporting <video> will request the file. That’s at least what my test confirmed, but as there are many more browsers and I can`t test in all I am not 100% sure this will always be the case. This way all browsers not supporting the video element will use the object and show the GIF as a fallback. I also added alternative text inside the object and two links after it to be able to easily download the GIF or video.
The advantage of this is that all users will immediately see the GIF/video, but it also feels hacky and as users using old browsers often also use slow hardware and slow connections, forcing them to download and parse all this data may be too much for their browser. So, I would say using the links to download should be enough. If the user want to see the GIF, they can always download it.
Conclusion #
Using <img src="file.gif" alt=""> is sure the easiest way to embed a GIF, but by doing so we force the user to download lots o unneeded data and slow down their device. In the future we may use <img src="file.mp4" alt=""> in all browsers, but it will take time until all browsers support this and until old browsers without support are not used anymore. Until, we can use an approach like shown here. This takes time to implement and I know this is not possible for everybody, but if you can do it consider doing it; Your users will thank you.
You can find the final demo here and you can also have a look at the final code on Github.