When building a web site, sooner or later, you will probably have to implement a form, be it a login form or a comment form. I have done it many times before, and the last time I had to create a comment form, I thought about how far I can enhance it. After adding one enhancement, another enhancement crossed my mind and after implementing that yet another one.
That’s why I would like to show you how you can enhance a form (in this case consisting of an <input> for the name, a <textarea> for the message and a submit <button>) from the most basic version to an EnhancedEnhanced™ Version with BackgroundSync.
Basic Version #
We start with the basic version, a HTML form:
<form action="./" method="post">
	<label for="name">Name</label>
	<input type="text" name="name" id="name">

	<label for="comment">Comment</label>
	<textarea name="comment" id="comment"></textarea>

	<button type="submit">Publish</button>
</form>
This will work in *every* browser. From here we start adding enhancements without breaking the basic version.
Here is a demo of the basic version.
Enhanced HTML version #
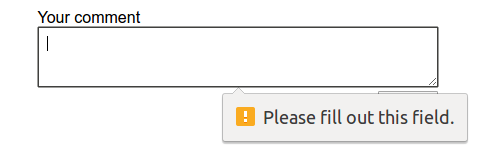
The first thing we do is adding an required attribute to our Textarea and as it should never be empty. If the browser supports HTML form validation we get validation out of the box without using JavaScript. We shouldn’t, however, rely on it (not supported browsers, browser bugs, …) so it is always a good idea to validate form values on the server side.
<form action="./" method="post">
	<label for="name">Name</label>
	<input type="text" name="name" id="name">

	<label for="comment">Comment</label>
	<textarea required placeholder="What's on your mind?" name="comment" id="comment"></textarea>

	<button type="submit">Publish</button>
</form>
Next, we add an placeholder attribute as a nice extra touch. Always keep in mind that you should never replace a label with a placeholder, it’s a great enhancement, but not a replacement.
Here is a demo of the enhanced HTML version.
Cut the mustard #
For further enhancements we will use JavaScript. First, we add a cut the mustard test to the <head> of our page. We are using a technique I first encountered in the article Enhancing optimistically by the Filament Group.
if( 'visibilityState' in document ) {
	// include loadJS here...
	function loadJS( src ){ ... }

	// This is a capable browser, let's improve the UI further!
	var docElem = window.document.documentElement;

	// the class we'll use to enhance the UI
	var enhancedClass = "enhanced";
	var enhancedScriptPath = "enhanced.js";

	// add enhanced class
	function addClass(){
		docElem.className += " " + enhancedClass;
	}

	// remove enhanced class
	function removeClass(){
		docElem.className = docElem.className.replace( enhancedClass, " " );
	}

	// Let's enhance optimistically...
	addClass();

	// load enhanced JS file
	var script = loadJS( enhancedScriptPath );

	// if script hasn't loaded after 8 seconds, remove the enhanced class
	var fallback = setTimeout( removeClass, 8000 );

	// when the script loads, clear the timer out and add the class again just in case
	script.onload = function(){
		// clear the fallback timer
		clearTimeout( fallback );
		// add this class, just in case it was removed already (we can't cancel this request so it might arrive any time)
		addClass();
	};
}
Custom error messages #
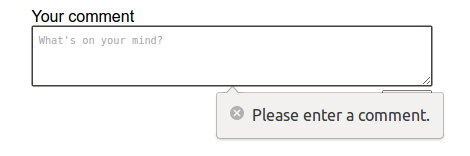
With our feature test in place we will add custom error messages, as “Please fill out this field.” isn’t a really nice message. In our enhanced.js script (which will only be loaded in capable browsers) we add the following to define a custom message:
// set a custom text for the error message
var commentArea = document.querySelector("#comment");

commentArea.addEventListener('invalid', function (e) {
	e.target.setCustomValidity("");
	if (!e.target.validity.valid) {
		e.target.setCustomValidity("Please enter a comment.");
	}
});

commentArea.addEventListener('input', function (e) {
	e.target.setCustomValidity("");
});
In this case we show the message “Please enter a comment” when a user submits the form without a comment. You may have noticed that I haven’t talked about styling the error messages so far. That’s because currently there is now way to style them with CSS. There used to be ::-webkit-validation-bubble for webkit-based browsers, but it has been removed. If you really want to style them you need to build your own validation bubble but be aware that there are many things which may go wrong so I would advise using the default bubbles as they give you all for free.
Here is a demo of the custom error message version.
Ajaxify #
All modern browsers now get a custom error message when the user tries to submit an empty comment, but if they enter a comment the form is still submitted server-side and therefore a page reload is necessary. Let’s enhance it by posting the comment via JavaScript.
// send form data with JavaScript
if( window.FormData) {

	var appendComment = function (nameValue, commentValue) {
		var comment = document.createElement('li');
		var commentName = document.createElement('h4');
		var commentComment = document.createElement('p');
		var commentWrapper = document.querySelector('.comments');
		commentName.innerText = nameValue;
		commentComment.innerText = commentValue;
		nameValue ? comment.appendChild(commentName) : '';
		comment.appendChild(commentComment);
		commentWrapper.appendChild(comment);
	};

	form.addEventListener('submit', function (ev) {
		var formData = new FormData(form);
		commentValue = commentArea.value;
		nameValue = nameInput.value;

		var xhr = new XMLHttpRequest();
		// save the comment in the database
		xhr.open('POST', './save', true);
		xhr.onload = function () {
			appendComment(nameValue, commentValue);
		};
		xhr.send(formData);

		// always call preventDefault at the end, see: http://molily.de/javascript-failure/
		ev.preventDefault();
	});
}
First we check if the browser supports FormData, an advanced XMLHttpRequest feature. If it does, we define a function appendComment() to append the new comment to the other comments. Next, we add and eventListener to our form to make an XMLHttpRequest on submit. If the request was successfull we append the comment. At the very end we call preventDefault to prevent the default behaviour of the form. It is important to call preventDefault at the end as we cannot be sure if the JavaScript might fail.
With that in place, our form ideally submits the comment without page load, but still works for unsupported browsers.
At this point you may wonder why I didn’t use Fetch. The reason is, I wanted to support as many modern browsers as possible without requiring a polyfill or only support the latest browsers.
Here is a demo of the ajaxified version.
Auto-expand the Textarea #
If you want to write a longer comment you currently have to scroll up and down if you want to recheck what you wrote. We can improve this by auto-expanding our Textarea.

For this, we are going to implement a solution I found on CodePen.
commentArea.addEventListener('keydown', autosize);

function autosize(){
	var el = this;
	setTimeout(function(){
		el.style.cssText = 'height:auto;';
		el.style.cssText = 'height:' + el.scrollHeight + 'px';
	},0);
}
With that in place the Textarea now adapts to the length of the comment and makes it easier to check what you wrote.
Here is a demo of the auto-expand version.
Prepare for success, error and poor connection #
So far we added HTML enhancements (placeholder and required attribute), defined custom error messages, ajaxified our form and added auto-expand for the Textarea.
Next, we will enhance the experience by showing when the comment was posted successfully or not and also show an indicator if it takes longer.
<p class="message" id="feedback"></p>
<button type="submit">Publish</button>
First we add a new element to our form to show messages.
var messageElement = document.querySelector('#feedback');
...
form.addEventListener('submit', function (ev) {
...
	xhr.onerror = function (error) {
		messageElement.className = 'message error';
		messageElement.textContent = 'There was an error posting the comment. Please try again.';
	};
	xhr.upload.onprogress = function (evt) {
		messageElement.textContent = 'Uploading: ' + evt.loaded/evt.total*100;
	};
	xhr.upload.onloadend = function (evt) {
		messageElement.className = 'message success';
		messageElement.textContent = 'Your comment was posted sucessfully.';
	};
...
If the comment is not successful for whatever reason we show an error message as defined in the error event, otherwise we show a success message as defined in the loadend event. In the progress event we add an indicator showing how many % of the comment are already uploaded. On fast connections you won’t see the indicator, but if you write a long comment and are on the go using a poor connection this helps to show that there is something happening and that the comment will be uploaded sooner or later.
Here is a demo of the progress version.
Service Worker and BackgroundSync #
Now, that we improved the experience with poor connections let’s enhance the experience for unusable connections.
// check for service worker support
if ('serviceWorker' in navigator) {
	// register the service worker
	navigator.serviceWorker.register('./service-worker.js');

	form.addEventListener('submit', function (ev) {

		let formData = new FormData(form);
		// send message via BackgroundSync
		navigator.serviceWorker.ready.then(function(swRegistration) {

			idbKeyval.set('comment', commentArea.value);
			idbKeyval.set('name', nameInput.value ? nameInput.value : false);
			messageElement.className = 'message info';
			messageElement.textContent = 'It seems you are offline. Comment will be published automatically once you are online again.';

			return swRegistration.sync.register('form-post');
		});

		// always call preventDefault at the end, see: http://molily.de/javascript-failure/
		ev.preventDefault();
	});

	// event to receive messages send by service worker
	navigator.serviceWorker.addEventListener('message', function(event){
		if (event.data == 'success') {
			messageElement.className = 'message success';
			messageElement.textContent = 'Your comment was posted sucessfully.';
			let nameValue = false;
			idbKeyval.get('name').then(function (data) {
				nameValue = data;
				let commentValue = '';
				idbKeyval.get('comment').then(function (data) {
					commentValue = data;
					appendComment(nameValue, commentValue);
				});
			});

		} else if (event.data == 'error') {
			messageElement.className = 'message error';
			messageElement.textContent = 'There was an error posting the comment. Please try again later.';
		}
	});


} else if ( window.FormData) {
First, we check if Service Worker is supported by the browser. If it does, we use BackgroundSync to post the comment, otherwise we will post the comment via an XMLHttpRequest as shown above in the Ajax version.
Let’s have a look at the code and what it does. On submitting the form we save the value for the name and comment in IndexedDB. In my case I am using a helper, a promise-based keyval store implemented with IndexedDB by Jake Archibald. We will also show a message that you are offline and the comment will automatically be published once you are online again. You won’t see this message when you have an usable connection and the form can be published immediately. Finally, we register a BackgroundSync with the tag “form-post”.
Next, we define an EventListener which checks for messages coming from the Service Worker to show if the comment was posted successful or not.
Now, let’s have a look what our service-worker.js looks like.
importScripts('idb-keyval.js');

const VERSION = 'v1'

self.addEventListener('install', function(event) {
	self.skipWaiting();
	event.waitUntil(
		caches.open(VERSION).then(function(cache) {
			return cache.addAll([
				'./',
				'./index.html',
				'../style.css',
				'enhanced.js'
			]);
		})
	);
});

self.addEventListener('fetch', function(event) {
	let request = event.request;
	if (request.method !== 'GET') {
		return;
	}
});

self.addEventListener('activate', function(event) {
	if (self.clients && clients.claim) {
		clients.claim();
	}
});

self.addEventListener('sync', function(event) {
	if (event.tag == 'form-post') {
		event.waitUntil(postComment());
	}
});

function postComment() {

	let formData = new FormData();

	idbKeyval.get('name').then(function (data) {
		formData.append( "name", data );
	});
	idbKeyval.get('comment').then(function (data) {
		formData.append( "comment", data );
	});

	fetch("./save",
	{
		method: "POST",
		mode: 'cors',
		body: formData
	})
	.then(function(response) {
		return response;
	})
	.then(function(text) {
		send_message_to_all_clients('success');
	})
	.catch(function(error) {
		send_message_to_all_clients('error');
	});
}

function send_message_to_client(client, msg){
	return new Promise(function(resolve, reject){
		var msg_chan = new MessageChannel();

		msg_chan.port1.onmessage = function(event){
			if(event.data.error){
				reject(event.data.error);
			}else{
				resolve(event.data);
			}
		};

		client.postMessage(msg, [msg_chan.port2]);
	});
}

function send_message_to_all_clients(msg){
	clients.matchAll().then(clients => {
		clients.forEach(client => {
			send_message_to_client(client, msg).then(m => console.log("SW Received Message: "+m));
		})
	})
}
Here, we first import the promise-based keyval store we also used in the enhanced.js to handle IndexedDB. Next, we define a const for the cache version and add functions to handle the install (add assets to cache), fetch (handle requests) and activation events. The relevant part starts with the sync version. Here, we first check if the tag is “form-post”, as it is the one we registered before in enhanced.js with swRegistration.sync.register('form-post'). If the tag matches, we call event.waitUntil(postComment());. This means that postComment will be executed as soon as there is an usable connection.
In our postComment function we define a new FormData and append the values for the name and comment which we get from IndexedDB. Next we use fetch to save the comment. When the comment was posted we will send a message back to the page to show an success/error message.
With that in place, the comment will now always be posted. If you are online it will be send straight away and if you are offline it will send as soon as you have an usable connection again, even if you already closed the page with the form.
Here is the demo of the EnhancedEnhanced™ version.
Note: if you want to test the offline functionality of the final version, please be aware that there is currently a bug in Chrome and using the “offline mode” in DevTools doesn’t work. You have to really go offline to test it.
Conclusion #
As you can see there are many ways to enhance a form and there are various other possible enhancements I didn’t mention. There are many ways to enhance it with CSS, which I didn’t mention at all here, but also many more ways to enhance via JavaScript. The great thing is, by using progressive enhancement *every* browser is supported. Some get a better experience than others, but all are able to perform the task of posting a comment.
Only a few people will get the EnhancedEnhanced™ version, but under certain circumstances every single of them may only get the basic version.
Here is the final demo of the EnhancedEnhanced™ version.
If you have any improvements or found a bug in the code please open an issue on Github.